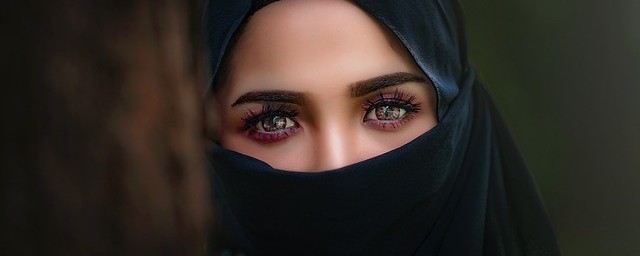
Drawing the eye may be a very difficult thing for a beginner. The eye is a complex subject and everyone’s eyes are different. For example, some eyes are slanted, some are drooped, some have single lids, some have double lids, some are further apart from each other, some are closer to each other, there are many more differences in different eyes. You may be frustrated at first for not being able to draw realistic eyes and feel like giving up, I’ve been there myself. So in this post, I’ll be talking about the structure of the eye and some tips when drawing a realistic eye.
Structure of the eye
It is very important for you to understand the structure of the eye in order for you to draw a believable and realistic looking eye. Why you may ask. Well, by understanding the structure of the eye and some of their functions, you will thus understand what you’re drawing instead just blindly trying to draw from what you see in your reference photos. You will know why you are drawing certain parts darker and certain parts lighter. You won’t be intimidated every time you see and try to draw a different eye. In this section, I will go through parts of the eye and their names.

Eye socket
The 2 eyeballs fit into the eye sockets on the skull. The eye sockets can be shallow or deep. This is why some people have deeper set eye and some people don’t.
Eyelids
The eyelids are pieces of skin that cover your eyeball. They close when you blink to keep your eyes moist. Some people have double eyelids while some people have single eyelids.
Waterline
The waterline is the top plane of your bottom eyelid. It also shows the thickness of your eyelid. If you’re familiar with putting on makeup, you’ll know that you can colour it for a smokey eye.
Eyelashes
Some beginners forget that we actually have eyelashes on our bottom eyelids as well. Eyelashes on the top eyelids are longer, denser and naturally curves slightly. Our bottom eyelashes are shorter and more sparse, they curve slightly as well.
Sclera
Also known as the white of the eye. It’s the white part of the eye.
Iris
The coloured circle at the front of your eye. It’s circular in shape. Colours vary depending on genetics.
Pupil
A circular hole in the middle of the iris, this is where light passes through and allowing us to see. It can be dilated or constrict depending on various conditions. It’s the darkest part of the eye.
Cornea
A clear convex bulge in the front of the eye, covering the iris and pupil. This characteristic is important when drawing the eye in different angles or when the eye moves around. You can see the bulge better inside views.
Tear duct
The tear duct is where your tears come out from. It’s a small triangle shape at the inner corner of your eye. Adding this feature into your eye drawings will make them look more realistic. The tear duct can be less or more visible depending on the eye shape.
Try out the 30 Days Free Trial! The digital painting software for illustration, comics and animation!
Tips and common mistakes
The iris is normally covered
Unless you try to open your eyes really wide, the iris will always be covered. Either by the top lid or bottom lip or both. This is a common mistake that beginners make, making the whole iris show. Just look around at your friends or families eyes and you will see that the iris will be covered partly.
The iris is not always a perfect circle
The iris is a circle when the eye is looking straight ahead in the front view, directly at the viewer. However, as the eyeball moves around, the iris will change to a more oval shape due to perspective. For example, when the eyeball turns left or right, the shape of the iris will be a narrower oval.
The photo below shows an eye that’s not looking straight at us. By circling the iris, you can see that the shape has turned to an oval due to perspective.

The sclera is not pure white
Another common mistake beginner artists make is leaving the sclera white. The sclera may seem white compared to the other parts of the face, but it’s not pure white. If you look carefully, there’s a gradation of tones due to the round shape of the eyeball. There may also be shadow cast onto the sclera from the top or bottom lid depending on the lighting. If you just leave the sclera white, the eye will look flat, not round.
In the photo below, I coloured picked the brightest area of the sclera and placed that colour right next to white. You can see that the brightest part of the sclera is still way darker than pure white.

Pupil size
As mentioned above, the pupil can change size depending on the situation. When under bright light, the pupil constricts in size to prevent too much light from entering and damaging your eyes. When in a dim environment, the pupil dilates and becomes bigger to allow more light to enter the eye so you can see better. When we see something we like our pupils will dilate too. In general, dilated pupils make you look more attractive than smaller pupils.
Distance between the eye
On average, the distance between two eyes on the face is one eye apart. However, depending on the person, that distance can be longer or shorter. If you are trying to produce a likeness of a person, this will be an important characteristic to take into consideration. My eyes are slightly longer than one eye apart.
The 2 images below show 2 pairs of eyes, one is one eye apart while another is slightly more than one eye apart.


Drawing the eyelashes
Many beginners draw eyelashes hair by hair, this will end up in an unnatural look. To draw the eyelashes more realistically, try drawing them in bigger groups. Also, remember that the hair gets thinner at the end. The length of the eyelashes also changes. Eyelashes at the sides of the eyelids are shorter and eyelashes at the centre of the eyelids are the longest. There’s a gradation of length.
Look at the photos of eyes above, you can see that they can be separated into groups and that they are curvy.
Recommended Reading
If you wish to improve your portrait drawing or painting skills, this book is worth a read. Even if you just want to draw and not paint, you’d still learn lots of useful information from this book. I’m still in the process of reading through it and I’ll make a book review on it once I’ve finished reading it.
Portrait painting: expert answers to the questions every artist asks.
Get the book on Amazon!
This book answers 200 common questions on portrait drawing and painting that artists have. They provide tips and talks about various topics such as materials, techniques, colours, value, facial features, structures, hair, proportions and lots more. You’ll definitely find information that’s useful for you. You can buy this book on Amazon here. If you get the book using the link I’ve provided I get a small commission which helps me keep reviewing more art products.
Now that you have a better understanding of the basic structure of the eye and its characteristics, try drawing some eyes yourself! Keeping in mind the tips and common mistakes I’ve mentioned in the post. I’m sure that as you practice drawing more eyes, you’ll definitely improve your eye drawings and make them more realistic looking.
Try out the Clip Studio Paint 30 days free trial!
It is the app for artists, designed for drawing & painting. Open the door to creativity without limits, with specialized features for illustration, comics, manga, webtoons, concept art, design, and animation built-in.
It is the main software that I use for my digital drawings. It is a cheaper(one-time payment!) alternative to Photoshop.
I hope you’ve enjoyed reading this post and has found it useful. If you purchase anything through the affiliate links that I’ve provided, I’ll get a small amount of commission (at no extra cost to you!) which helps me continue writing art-related blog posts and tutorials like this one.
Support me on Ko-fi! Your donations and support mean a lot to me and it helps me keep doing what I’m doing!
Like my artworks? You can get them in prints, stickers or badges form on my Etsy shop!
Follow me on Instagram to see more of my art!
You may also be interested in:


