
Drawing the head have always been one of the many difficulties that an artist struggle with. To draw a decent head, you will need to know how to draw the facial features properly as well. However, just knowing how to draw the different facial features is not enough, you’ll need to place them properly on the head to complete the whole head. Since the head is made up of different facial features, being able to draw them properly first will help you in drawing the head as a whole.
In this post, I will be going through how I construct and draw basic anime-styled heads. If you’re interested in how to draw more realistic head proportions, I’ve made a post about it here. I will also talk about how you can modify the proportions to achieve different styles. This post will only be for drawing the head and placing the facial features in the front view. I will make a separate post on drawing in different angles, facial features and hair in the future.
Try out the 30 Days Free Trial! The digital painting software for illustration, comics and animation!
Examples of different anime styles
As you probably already know, anime-styled drawings can differ quite a bit depending on the artist. Once you’ve learnt the basic proportions and guidelines, you can change things up depending on your own preferences! Below are some anime-styled heads in different proportions. As you can tell, they have very different proportions ranging from more realistic to less realistic.
General Construction Process
Below is just one way on how you can construct an anime style head. There are many other ways you can draw them, simply do a google search and you’ll see how other artists approach drawing heads.
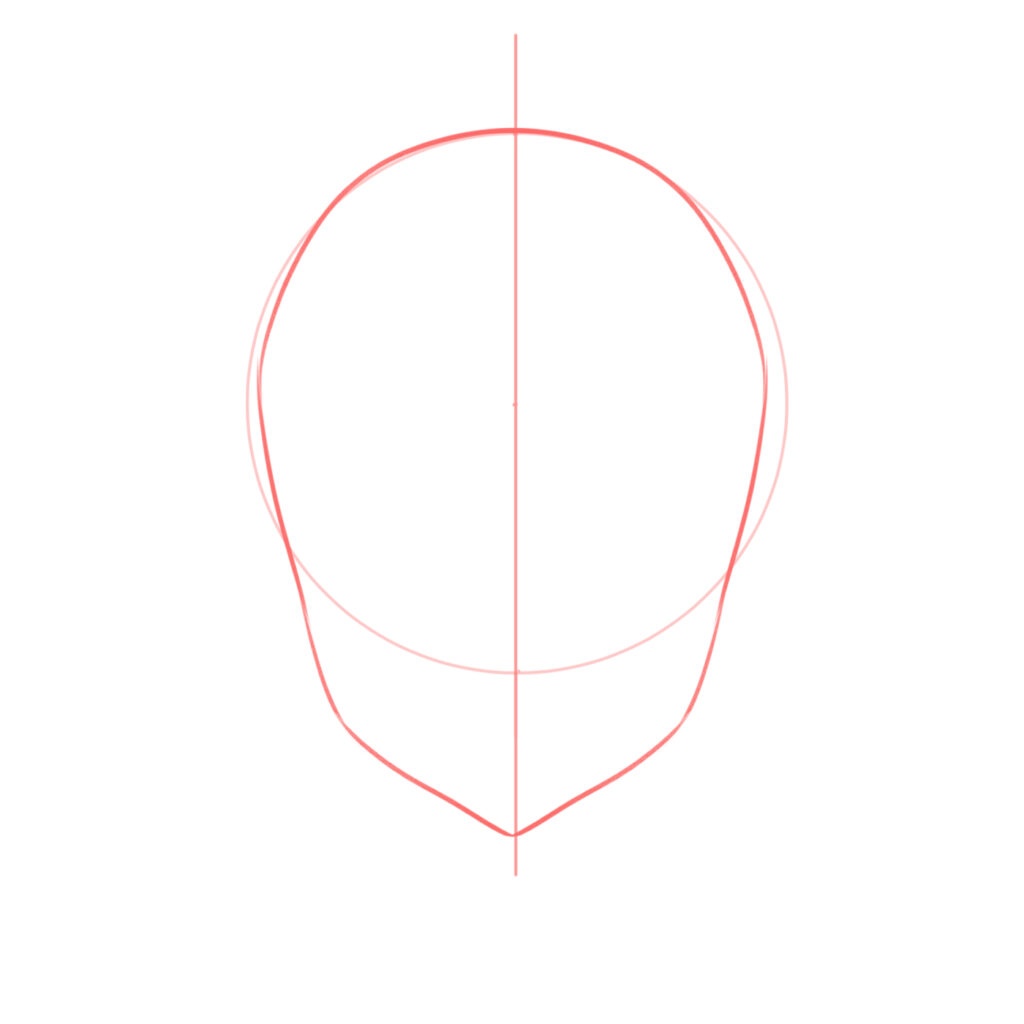
First, draw a circle or an oval for the general head shape, In my case, I drew a circle. If you have difficulties drawing circles and ovals, you can use the shape tools in your digital drawing software.
Now, draw a vertical line down the middle of the circle, this is the centre line and your nose will be placed somewhere on that line.
Then, using the circle as a guide add in the chin and shape the whole head. How long or short the chin depends on your preferences or the style you want to achieve.
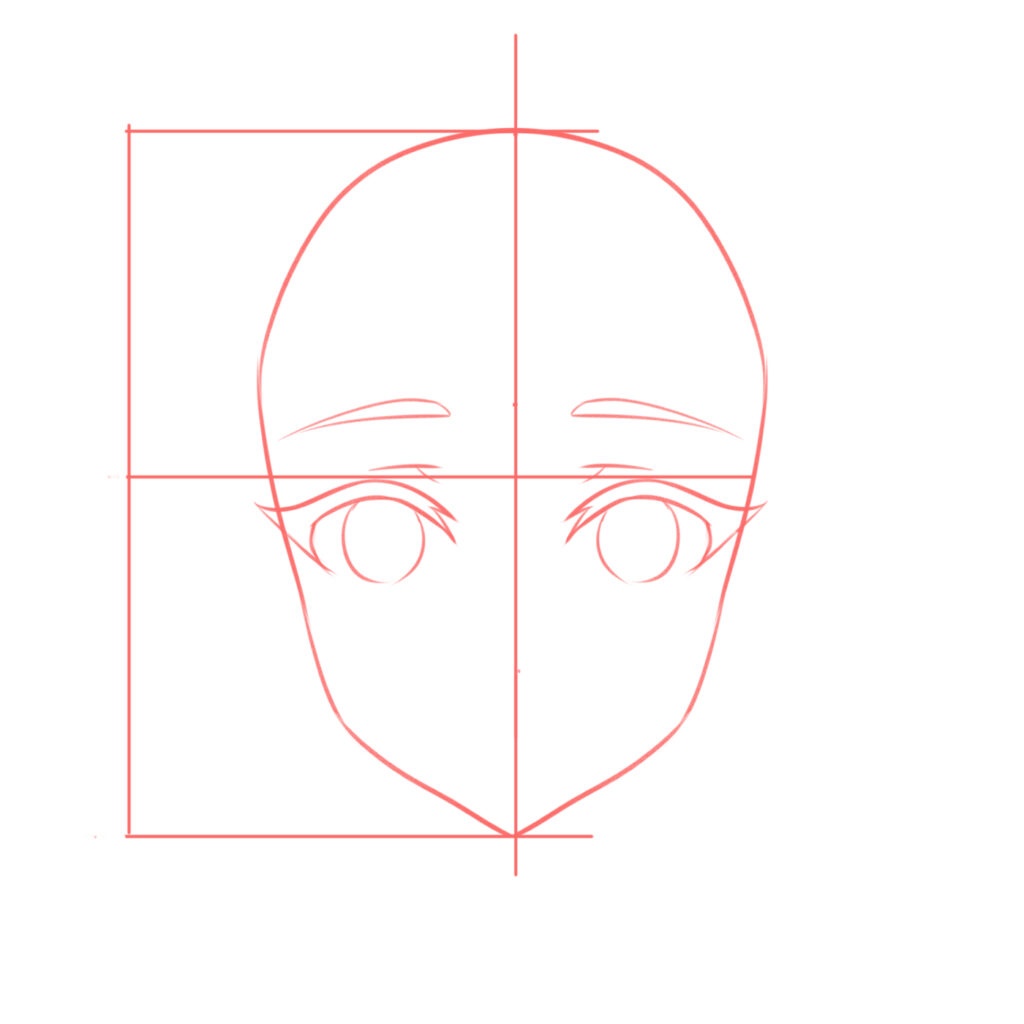
Add a horizontal line in the middle of the head. This is where the top of the eyes will be. In a realistic style, the eyes would be higher. The eyes should be roughly one eye apart. However, since it’s anime style, you can place them slightly closer if you want.
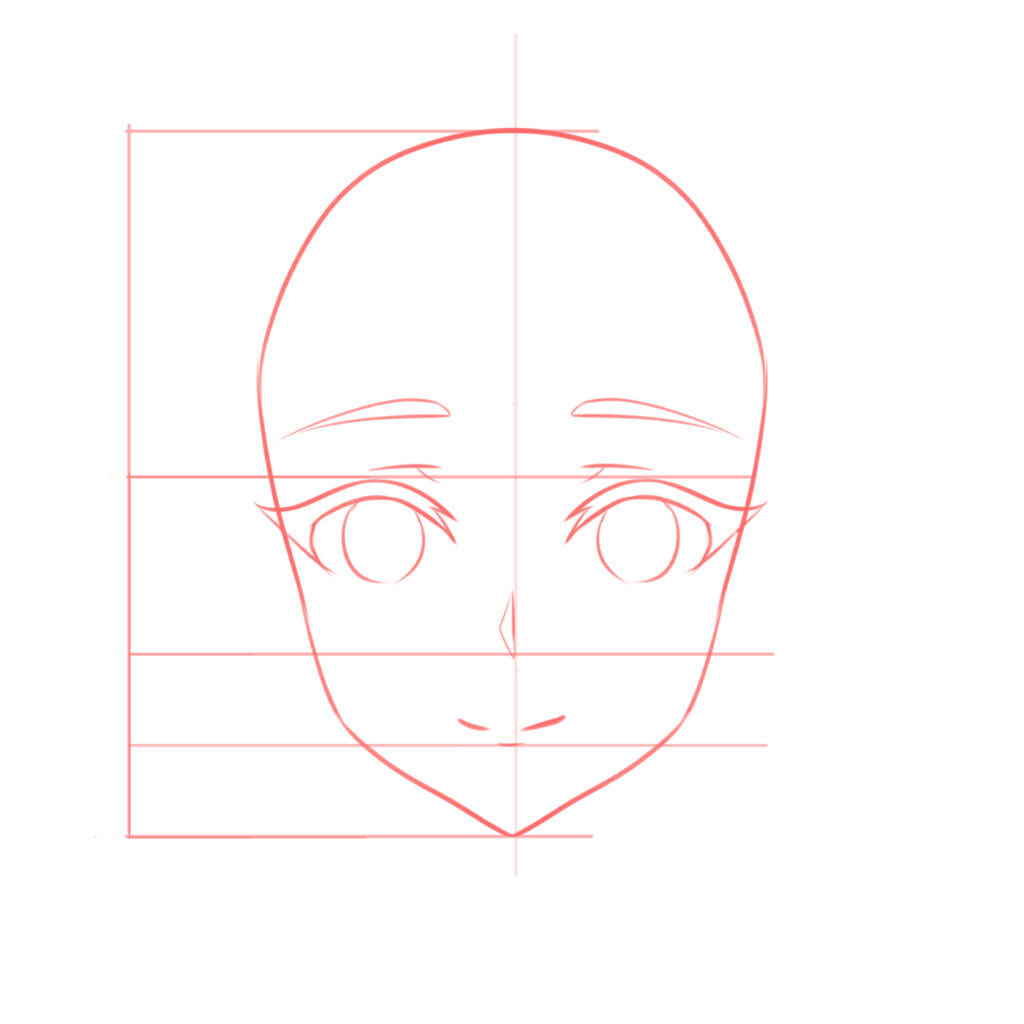
The nose is placed in the middle between the bottom of the chin and the middle of the eyes.
The lips will be placed slightly above the middle between the bottom of the chin and nose.
For a front view where the head is facing forward and not looking up or down, the top of the ears will align with the top of the eyebrows and the bottom of the ears will align with the nose. However, since it’s anime style, the ears can be smaller.

And above we have a proportional looking anime head! Add in the neck and hair and we have a complete drawing of an anime head!

Drawing the guidelines will help you draw the head and place the facial features more accurately. However, once you’ve done a few of them and are more experienced in drawing the head in this view, you should be able to draw them with less guidelines and quicker.
Changing up the proportions to suit your own style!
Here comes the fun part! By changing the proportions, you can create different looks. I will go through a few examples and the changes made to achieve the style.
Cute/ chibi style
The trick here is big heads, big eyes and short chins! I’ve made a more detailed post on how to draw the chibi style here.
From the picture above, you can see that a cute chibi style head is a lot shorter and rounder, thus cuter. The eyes are placed a lot lower on the face and there is little space for the nose and mouth. Some of the noses are almost on the same line as the bottom of the eyes. The eyes are also relatively larger.
More matured anime style
For a more matured anime head, the proportions should be more towards a realistic proportion. I’ve made a post about it here.
As you can see from the example above, the eyes are relatively smaller and slightly higher.
Above are how to draw the head in anime style in front view! I hope you’ve learnt something new from this post and are able to draw your very own anime head in proportion.
Start your digital painting journey with Clip Studio Paint!
Try out the Clip Studio Paint 30 days free trial!
It is the app for artists, designed for drawing & painting. Open the door to creativity without limits, with specialized features for illustration, comics, manga, webtoons, concept art, design, and animation built-in.
It is the main software that I use for my digital drawings. It is a cheaper(one-time payment!) alternative to Photoshop.
I hope you’ve enjoyed reading this post and has found it useful. If you purchase anything through the affiliate links that I’ve provided, I’ll get a small amount of commission (at no extra cost to you!) which helps me continue writing art-related blog posts and tutorials like this one.
You may also be interested in:
- How to draw anime chibis – general features
- Digital painting for beginners
- My digital painting setup, tools and software
Support me on Ko-fi! Your donations and support mean a lot to me and it helps me keep doing what I’m doing!
Like my artworks? You can get them in prints, stickers or badges form on my Etsy shop!
Follow me on Instagram to see more of my art!





6 Responses
This is really good!! GOOD JOB!
Thanks!