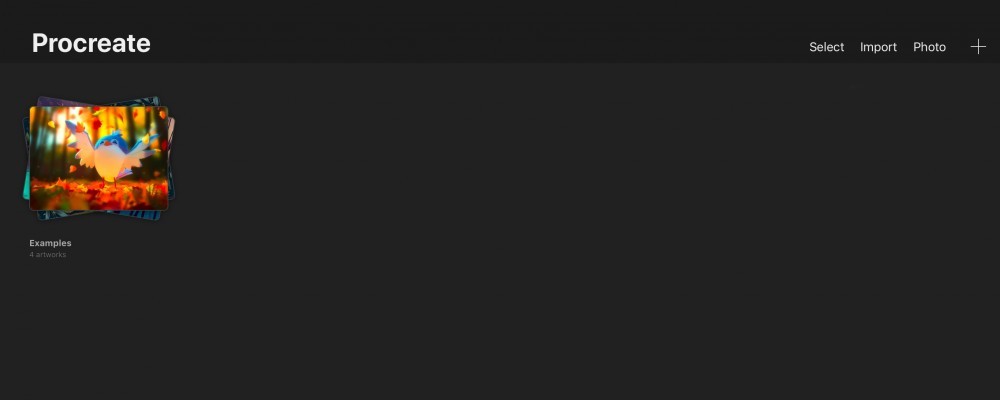
Welcome back to my tutorial on how to use the Procreate App, In this post, I will be talking about the main Art Gallery interface. You will learn how todo things like :
- Manage your art gallery
- Import and export artworks, photos and files
- Create new canvases
The 3 main options on the top right of the Gallery page are:
- Select
- Import
- Photo
- + (New canvas)
I will go through them one by one.
Select
Select a few artworks to apply an action on to all of them at the same time. The actions are:
- Stack
- Preview
- Share
- Duplicate
- Delete
Stack
- To stack artworks
- Select more than one artwork to stack, or press and hold on an artwork and drag it on top of another stack to add it into the stack.
- To move an artwork out of a stack.
- Press and hold on the artwork and move it above the words ‘stack’ on the top left, hold there until the page jumps back to the main gallery page. Then release your finger.
- To rename a stack
- Simply tap on the name.
Preview
A full-screen view of the artwork, swipe left and right to see other artworks. If you’ve selected a few artworks to preview, only the selected artworks will show.
Preview shortcut: use two fingers to pinch outward.
Share
- Sharing your artwork
- You can share your artwork in different formats: Procreate, PSD, PDF, JPEG, PNG and TIFF files are all supported in Procreate.
- Backing up your artwork
- You can also use this to back up your artwork in different formats. In the files option after you’ve pressed ‘share’, you can upload your artwork to iCloud, Dropbox, your iPad etc. You could also import them to your iTunes on your computer.
Duplicate
You can duplicate a single artwork or a whole stack to save multiple copies of your work.
Delete
You can delete a single artwork or a whole stack
Import
You can import a photo or a file like Procreate, PSD etc from multiple locations such as iCloud Drive, Dropbox, on your iPad.
Photo
You can import a photo from your Photos app on your iPad.
New canvas
Artworks done in procreate are stored as procreate files, they are designed to use less space and decrease load time. You can work in layers and easy sharing and backup.
- Create a new canvas
- When you tap on the + sign to create a new canvas for your artwork, you will see some premade canvases. Press on an option to create a new canvas and start drawing.
- To edit or delete the saved canvases settings
- Swipe left on a canvas option. The screen size preset canvas at the top cannot be edited.
- Create custom size canvas
- Custom canvas options: width and height in px, DPI, colour: sRGB or P3 wide colour, name. P3 wide colour allows you to use extremely saturated coloured
- Note that as you increase the size of the canvas, the number of layers you can work on will decrease. You can see the maximum layers allowed on the top of the number pad.
Shortcuts/ tips for managing your gallery
- Swipe left on an artwork or stack to share, duplicate or delete.
- Rename canvas in the gallery by tapping on the name
- In selection mode, drag a finger along artworks to quickly select multiple artworks.
- Rotate artwork in the gallery using 2 fingers.
- Double-tap to open canvas, also works in preview mode
- To change the position of an artwork, press and hold and move to the desired location and let go
So these are the things you could do in the Gallery interface. Explore around and try them out!
In the next post, I will be talking about some of the Canvas page interfaces where you will be doing all your drawing.
Try out the Apple Pencil to bring your creative process to the next level on the Procreate App!
These artist gloves for digital painting are a must for me when I paint on the iPad, when I don’t wear the gloves, sometimes the Procreate app sense my palm resting on the screen as 2 fingers tapping and holding and start undoing! Or sometimes it starts colour picking. I’ve tried the different palm support options but I still get the problem sometimes. If you’re having these kinds of problems as well, the gloves may be your solution, it makes you feel and look more professional too!
You may also be interested in:

